Oct 28, 2019
Dining rooms and kitchens – the places where families and friends gather – can use a bit of freshening up every now and then. Gone are the days of stuffy, overly-formal dining rooms, so let’s take a fresh look at how these areas can be perked up to suit your family’s style. With the holidays coming up and gathering times just around the corner, excite your guests with these bright ideas.
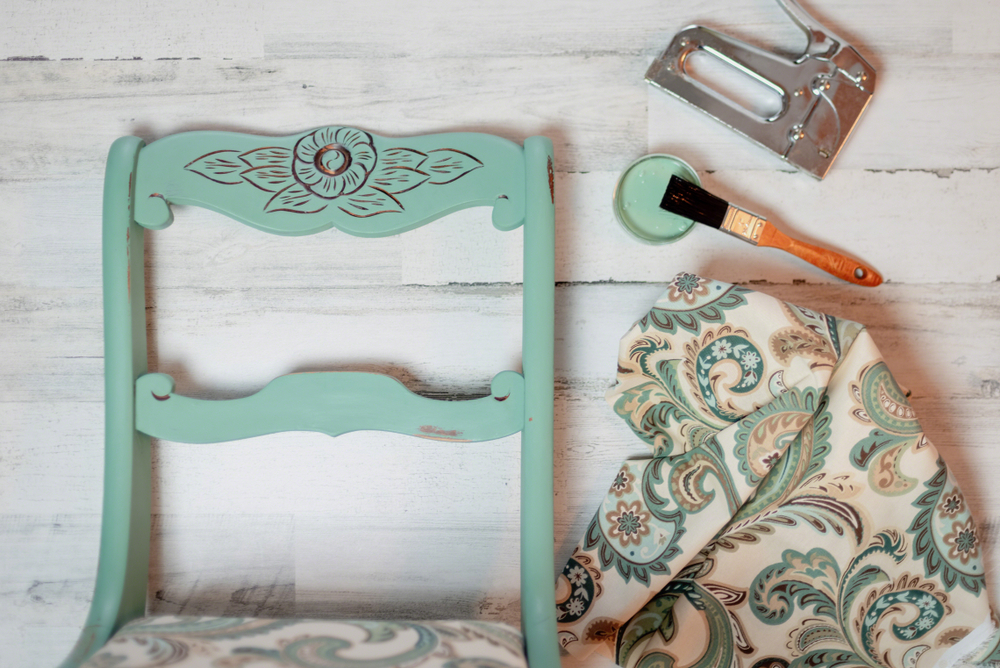
Wood dining furniture is very versatile. Take your basic kitchen chair for example. You can change things up by adding a fabric seat cushion simply by attaching ties to the back side. If your seats are already cushioned, a fabric change can easily be done to create a whole new look. Unscrew the seat and remove the old fabric by pulling out the fasteners (either screws or staples, usually). Tip: You may not even need to remove the old fabric – if it is not damaged or ripped, you can just place the new fabric on top. Start by attaching the fabric to one side using a staple gun. Pull taught and stretch to the opposite side. Repeat on the remaining two sides and reattach to the chair base. Voila – a new look!
Wood dining furniture can also be painted to make an even bolder statement. Instead of sticking with a wood stain, browns and black, why not go with a bright green, navy blue, or even yellow? If you’re feeling really eclectic, choose four coordinating colors and paint each chair differently. Before you paint, sand away the existing finish and prime the bare wood. Follow that with your color in a trim enamel finish. This will make it easier to clean.
Decorate your refreshed table and chairs with a seasonal centerpiece. Fall decorations are durable and will last you well past Thanksgiving. Fresh gourds and pumpkins, particularly white pumpkins, transition well from Halloween to the holidays in November and December. Pair them with candles and pine cones to complete the look.

Oct 21, 2019
Nothing is much better than a warm cup of steaming apple cider. While store-bought may be convenient, homemade apple cider can’t be beat. Not only does it taste more fresh and authentic, but you can specialize it to your tastes – whether that be more or less sweet, or spicier. Though it doesn’t take long, taking the time to prepare your own fresh cider can make for a fun fall afternoon. Not to mention it will make your house smell delicious while it’s brewing! We recommend preparing a big batch, as this recipe can last for up to 5 days in the fridge, or frozen for up to three months.
Ingredients
- 10-12 medium-sized apples (works best with a variety of types), quartered
- 2 oranges, quartered (peel the oranges for a less tart cider)
- 4 fresh cinnamon sticks
- 1 tablespoon whole cloves
- Roughly 16 cups of water (more or less depending on preference)
- ½ cup sweetener of your choice (maple syrup, brown sugar, honey)
Optional seasonings:
- 1 teaspoon allspice
- 1 whole nutmeg
- 1-inch fresh ginger
Directions
This recipe can be made on the stovetop in a large pot, or in a crockpot or pressure cooker.
- Add the cut apples, oranges, cinnamon sticks, and cloves and any extra seasonings you are choosing to use to your pot of choice. Completely cover the ingredients with water, with at least one to two inches of room at the top of the pot.
- Heat up the cider over high heat until it begins to simmer. Then, reduce the heat to a medium-low setting, cover and simmer for roughly two hours, or until the apples are soft.
- Using a wooden spoon, mash the apples and oranges against the sides of the pot in order to release more flavor. Cover and simmer for another hour.
- Next, we’ll strain the cider. Using a fine-mesh strainer or a cheesecloth, pour the apple cider mixture through the strainer in order to separate the solids and the liquid. Repeat if necessary and throw out the solids.
- Sweeten! Add in the sweetener of your choice. About ½ cup is recommended, but add less or more to fit your tastes.
- Lastly, serve warm! If serving to guests, add an orange slice or a cinnamon stick to each glass, and have bourbon or brandy on hand if people would like to spike their cider.

Oct 14, 2019
With only two and a half months left in this decade, companies are looking to the future, and Sherwin Williams has just announced their Color of the Year for 2020… Naval. This deep, dark blue resembles the night sky or the darkest depths of the ocean. Here’s how you can incorporate this stylish color into your home.
Because Naval is so dark, it works perfectly as an accent wall color. Pair it with a creamy white on three of the four walls in a large room, like your living room (on the TV or fireplace wall) or master bedroom (behind the headboard). Got built-ins? Use Naval on the wall behind the shelves to create a splash of color that provides a stunning backdrop to your accessories.
Naval is the perfect color for the kitchen and bathrooms because it works perfectly with any type of metal. Gorgeous gold and bronze features really pop when put up against Naval. Tall faucets and ornate light fixtures stand out and give you that eye-pleasing contrast. The bonus is that Naval works with chrome, silver, brushed nickel, rose gold, copper and any other metal you can find!
Use Naval on a gallery wall with mix-and-match frames in white, bronze, gold and silver. Natural wood colors for hanging shelves or picture frames work here, too, and give a more down-to-earth feel.
Thinking a nautical theme? Think Naval! As its name implies, the deep color is taken right from our armed services Navy uniforms, so any type of ocean-theme will tie-in.
Use Naval on kitchen cabinets and the kitchen island. Add brass knobs and handles to cabinet doors and drawers, and set up brass barstools at the breakfast bar. Marble countertops and an oak wood floor complete the look.
Whether inspired by the night sky or the ocean depths, Naval is an earth tone so it naturally coordinates with earthy greens like Sherwin Williams’s Kale Green. If you don’t want to paint with green, place large houseplants adjacent to your Naval walls and achieve serenity in your home.

Oct 4, 2019
Here in Texas, tortilla soup is a popular dish that is heartwarming and simple to make. Made with ingredients you likely typically have on hand in your pantry, you can make this meal just about anytime. Try out this super easy one-pot version that you’re sure to fall in love with!
Ingredients
1 pound boneless chicken breasts
1 teaspoon olive oil
1 diced onion
2 cloves garlic (crushed)
1/2 teaspoon ground cumin
2 cans of chicken broth (29 oz.)
1 1/2 cups frozen corn
1/2 teaspoon chili powder
1 can black beans (15 oz.)
1 1/2 tablespoons lemon juice
1 1/2 cups chunky salsa
Directions
- In a large pot over medium heat, sauté the chicken in the olive oil for about 5 minutes. Add the onions and garlic to cook for a few minutes. Then add cumin and mix well.
- Add in the broth, corn, chili powder, beans, lemon juice, and salsa and stir. Reduce heat to low, cover and simmer for about 20 to 30 minutes.
- Crumble some tortilla chips/strips and add to individual bowls. Once the soup is hot, pour it into the bowls over chips. Top with the Monterey Jack cheese and a little sour cream or avocado if desired.
To mix things up, try topping with cilantro, lime juice, jalapenos or green onion. The possibilities are endless, and one reason this dish is such a crowd pleaser is because of how customizable it can be!


